Google Analytics

Showing posts with label craft. Show all posts

Friday, September 9, 2011

DIY upholstered headboard


During my 10 day crafting extravaganza at our Montana cabin, I managed to whip out a DIY upholstered headboard for a queen size bed in one of our guest bedrooms.  This project took me less than 45-minutes to complete.

Materials:
4x8 plywood cut down to 4x5 ($6.00 at Lowes, the cutting is free - just ask)
Twin sized foam mattress topper ($9.99 at Walmart)
1 1/2 - 2 yrds upholstery fabric (I used Waverly Small Talk Mint Julep, $14.98/yrd)
Staplegun
3M spray adhesive
Scissors
Hardware to attach the frame to the bed ($.10 for each nut/bolt) & drill

Instructions:

Spray the back of your mattress topper with adhesive, and attach it to the plywood (textured side down). You may want to let the foam hang 1 inch over the edges of the headboard, in order to soften them.

Cut an approx 10" strip from your fabric, and set aside.  Now, align your fabric on top of the foam, making sure your fabric is long enough to cover the area of the headboard that will be exposed (above your mattress) and that, if applicable, your fabric's pattern is facing the right direction.  If your fabric isn't wide enough to cover the headboard with the pattern facing the right-way (I ran into this problem), get creative.  Stitch strips of fabric along the outside edges to widen, or break your fabric up into thirds and stitch. 

Once your fabric is aligned, start stapling the top edge to the back of your headboard.  Once you have a few staples in, pull the fabric tight and place a few staples along the bottom edge of the fabric (into the front of the plywood).  Continue stapling until the fabric is secure.  Save the corners for last.

To finish off your headboard you'll need to attach the strip of fabric you set aside earlier to the exposed sides of the plywood (near the bottom).  Make sure your fabric is wide enough to cover the area that will be visible, cut to size, and staple.

Attach your headboard to your bed frame.


Monday, August 22, 2011

Refurbished caned chair


Tada! ("before" pic here)

After stripping off the old fabric, I gave the chair a light sanding, followed by a couple coats of Rust-Oleum's paint + primer in gloss white.  I finished off the paint job with a clear protective coating.  Note: this was the first and last time I'll use a paint+primer - it offered zero stain blocking, and there was a LOT of over-spray.  On a positive note, the paint really had a glossy finish.

Although I purchased upholstery buttons, I ended up re-using the original buttons because they had brads on the back - which meant zero sewing (yay!).  I simply cut out tiny circles of fabric, and then glued the fabric onto each button.


I was a bit leery about making double welt cord (tutorial here), but it wasn't so bad once I got the hang of it, and it sure gave the chair a finished appearance.  Note: you use double welt cord to cover visible staples

Another shot of my lovely refurbished cane chair from a slightly different angle:

The DIY Show Off The Shabby Nest

Thursday, August 18, 2011

My newest project: caned chair makeover


Last night I decided to tackle my newest project, this being refurbishing the caned chair pictured above (I actually bought a matching pair off Craigslist).  Step 1: removing the upholstery.  Tools: a screw driver, needle nose pliers, and brute strength.


I took a lot of pictures so I can remember how to put the chair back together, and saved as much of old upholstery as I could to use as patterns.

Almost finished....


A couple inspirational photos:


Tuesday, July 12, 2011

"Look ma' - a quilt!"


I tried to cut perfect quilt squares and then sew the squares together in perfect lines, I really did - but somehow they ended up being a little off.

Oh well - faced with the uneven edges of my patchwork quilt I decided to simply cut them straight and make my binding a little wider to make up for the lost inches.


After attaching the binding to my quilt front (instructions at cherry menlove), I measured and cut my quilt back (I found the 90" wide fabric at JoAnn)


I then made a quilt sandwich (quilt top, batting, back), smoothed out the wrinkles, and pinned the layers together.  I also pinned the binding to the quilt back.

I hit a bit of a wall after I made my quilt sandwich.  As is - I'll have to hand sew the binding on the back, but for some reason I feel like I could have machine sewn three sides, flipped it right-side out, and then only had to hand sew one side.

Is that possible?  Do any of the quilters out there have binding tips?

My lovely, almost finished quilt all folded up
(looks so quilty!)

You the find my first post on my adventures in quilting here.

Thursday, July 7, 2011

Changing a painting's color scheme


Check out how my sister easily changed this painting's color scheme to match her new kitchen decor (post here: http://christielynnjones.blogspot.com/).

Tuesday, July 5, 2011

The best laid (painting) plans...

My friend Lis is the foremost expert on all things related to paint - having successfully painted the entire interior of her home.  Therefore, when I decided to paint a couple rooms in our new Montana cabin, I first consulted my painting guru on the best brand of paint to use.

After she gave the thumbs up to Benjamin Moore paint, I literally spent hours obsessing over their color palettes.  Who knew there were so many shades of grey?

Unfortunately, this past weekend I discovered that the Home Depot in Kalispell does not carry Benjamin Moore paint - so all my obsessing and planning was for not.  Sigh.

On a whim, I ended up going with:

Martha Stewart's Painters Chalk


"Before"
(downstairs bedroom)

"After"


"Before"
(den/library)

"After"
(note: not quite finished)

Both brands offered decent coverage (note: I primed before using the MS paint), and were low VOC.

Wednesday, June 29, 2011

Revamped dining room table: Raindrops on Roses

Check out my sister's adventures in revamping her dining room table on her blog: Raindrops on Roses


A reupholstered chair seat using Waverly's Sun n Shade fabric in
Parterre Indigo (tip: indoor/outdoor fabric is super easy to clean)

Thursday, June 23, 2011

The Rub 'n Buff experiment


I bought a tube of Rub 'n Buff  after exploring a variety of options for turning brass hardware silver (e.g. spray paint, silver leaf, and leafing pens).

In the end, I decided to stick with the original brass hardware on the nightstand I was refinishing, which left me with a tube of untried crafting fun.

Which leads me to the frame I bought at Ross for $3.00.  I didn't initially intend to put a silver accent on it, but I thought "Hey, why not." (note: click on photos to make them larger)

"Before"

"After"

It's not a dramatic difference, but it satisfied my curiosity and demonstrated that the product actually works.

A couple other Rub 'n Buff projects:


Tuesday, June 21, 2011

Feeling blue (painted laminate nightstand)

"Before"


The white laminate nightstand pictured above was another one of my Value Village finds - and cost me a whopping $9.99 + tax.

At first glance it didn't look too shabby - but a closer look revealed stains, warped spots, and ingrained dirt.  Also - I didn't get the oversized knob.  I'm sure its supposed to be whimsical/child like, but...
After cleaning and sanding a couple rough spots on the top, I primed the nightstand with Zinsser Cover Stain.  I let the primer dry, then lightly sanded to remove brush strokes and drips before applying two coats of RustOleum American Accents paint in wild flower blue.  Note: Its important to prime laminate before painting, otherwise your paint will eventually bubble.  On a positive note - you don't need to sand before priming.

A crystal knob, purchased at Anthropologie on sale for $2.95, added a lovely finishing touch.

"After"

It'll look perfect in one of the guest rooms in our Montana cabin (between two twin beds).  Purchasing a similar night stand brand-new could have cost me as much as $145.00.

 The DIY Show Off

The Shabby Nest

Wednesday, June 8, 2011

Painted thrift store nightstand

"Before"
(my cat is so nosy!)

I found the lovely (yet warped/scratched/scruffy) nightstand, pictured above, on a thrifting adventure with my partner in crafting, Leigh.

While it looked like a hot mess - I thought it had potential (solid wood, woohoo!) - so I ponied up $9.99 + tax and took it home.

For my maiden painting voyage I used: Zinsser spray primer (oil-based - needed a primer since it was so damaged), Rust-oleum spray paint in heirloom white (1.5 cans), Minwax water-based poly-acrylic, a mask, a medium grain sanding sponge, and a drop cloth.  I relied heavily on the tutorial here and the FAQ's here - both via Centsational Girl.

"Work in Progress"

If I had a time machine I would do the following differently:  I'd use a brush on primer, which goes on thicker, on the top of the night-stand for durability and to hide blemishes, and I would do a better job sanding my primer drips (it took me a while to perfect my spray paint technique).

I'm going to sew a little runner for the top of the nightstand using the material I bought to re-upholster the chair in a post below.

"After"


A couple notes:  I didn't sand all the original finish off, I only sanded enough to rough up the surface of the nightstand and remove any lacquer/debris.  The mask is definitely a MUST when you're sanding and painting (wood particles/fumes).  If I ever paint anything bigger than a nightstand I'm definitely using traditional paint.  The fumes are KILLER (and bad for the environment, I feel a little guilty, but re-using furniture instead of buying new furniture must get me some carbon credits, right?). Finally, re-painting furniture doesn't take a huge time commitment.  My total "active" time on this project was probably an hour.


The DIY Show Off

Sunday, June 5, 2011

DIY: easy chair reupholstery

"Before"

I've been reading a lot of DIY blogs lately (such as Centsational Girl), which has inspired me to try my hand at thrifting and re-finishing/re-upholstering furniture.

I picked up the chair above at Value Village for $5.00.  I loved the look of the wood, but the retro 70's mustard velvet corduroy upholstery was a bit of a turn-off.
To reupholster the seat, I needed: fabric (I picked one from Dwell Studio at Jo-Ann, 50% off) , scissors, a screw driver, and a staple-gun.  

I unscrewed the seat from the chair, used it as a pattern to cut my fabric, and then tightly wrapped the new fabric around the seat - stapling as I went.  I saved the corners for last, and experimented with a few folding techniques until I got the look I wanted.

When I reattached the seat I also tightened the other bolts in the chair.


After

The chair is going to look fantastic in one of our guestrooms!  Next project: refinishing/painting an old nightstand ($10.00).

Note: I purchased new foam for the chair, but since the old fabric/foam was in good shape, I decided to just put the new fabric over the old.

Friday, May 27, 2011

Adventures in Quilting

I am the most amateur of quilting novices since I've never even made a quilt - however, what I lack in experience I make up for with sheer enthusiasm.

This leads me to my current crafting project: two twin-size patchwork quilts (inspiration & a basic how-to from Cherry Menlove).


The fabric

Cutting squares
(I used our big wood cutting board and a salt cellar as a weight)

The first quilting casualty
 (never cut towards your hand)

Laying out the quilt

The hardest part so far has been cutting the squares, but only because it takes patience and precision (I'm more of an immediate gratification, "who cares about lines," kinda' gal).  This is definitely one of those "no short-cuts allowed" type of projects.

I'll keep you updated on my progress!

Tuesday, April 12, 2011

Name Banner

The inspiration for this project came from The Land of Nod.

Project: Name Banner!!

You need: Paper
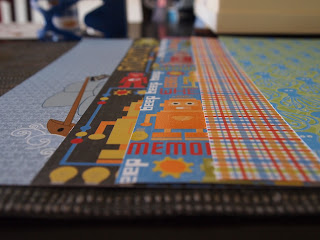
(we got ours from the scrapbook section at the
craft store; name: All About Boys)

Letter Stencils (also from the craft store, about $3)

A hole punch (to punch holes in the tops of the letters)

And ribbon (tada!)

We made two banners for less than the cost of one if we purchased the banner from The Land of Nod - AND we still have tons of paper and ribbon leftover!