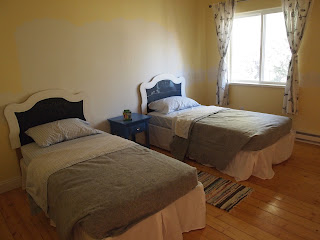
First, please ignore the wonky wall in the background. I was hoping we could get the bedrooms in our cabin painted before our guests came over for Labor Day weekend, but our handyman barely had time to finish and prime the drywall (did I mention we had to re-plumb the whole place and had big gaping holes in the several walls?)
Anyhoo, I did manage to finish my chalkboard headboard project (inspiration here). Instead of breaking out the saw and trying to shape a piece of plywood, I decided to buy a cheapo headboard (my fingers thank me).
I taped off the area I wanted to cover with chalkboard paint, applied a coat of primer, then two coats of chalkboard paint. After letting it dry for three days, I conditioned the chalkboard with the side of a piece of chalk, erased, and then set out a box of colored chalk for my friend Leigh's kids.
I definitely think I either need to (1) cut a couple inches off the headboards' legs or (2) paint the legs white....but that's a project for another time.


love this idea!
ReplyDeletei may steal it for Flora as a toddler! ;)
Please do!
ReplyDeleteThe kids were really over the moon about it. The first thing they did when the got into the room was break out the calk.
I meant "chalk"
ReplyDelete